 Software
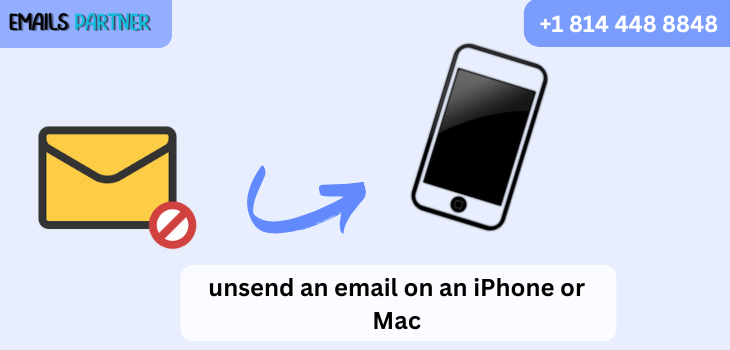
Step-by-Step Instructions to Unsend an Email on an iPhone or Mac
In today’s digital era, sending emails has become second nature. But what happens when you accidentally hit send too early, forget an attachment, or send the message to the wrong recipient? Thankfully, Apple’s Mail app offers a safety net that allows users to unsend an email on an iPhone or Mac—a feature that has saved countless professionals and casual users alike from awkward or costly mistakes. This guide provides detailed, step-by-step instructions on how to use this lifesaving feature, including tips, limitations, and best practices for Apple users.
Introduction to Apple’s “Unsend Email” Feature
Apple introduced the “Undo Send” feature in iOS 16 and macOS Ventura to address a common issue: the immediate regret after sending an email. Whether it’s a typo, an incorrect attachment, or a message sent to the wrong person, the feature gives you a brief window of opportunity to retract the message before it’s officially sent.
This function is not exactly a recall, as seen in some platforms like Microsoft Outlook. Instead, it delays the actual sending of the message, giving users time to stop it before delivery.
How It Works: The Technical Perspective
When you send an email using the Mail app on your iPhone or Mac, the system introduces a brief delay (up to 30 seconds). During this period, the email is not transmitted to the recipient, allowing you the option to “undo” the send. If the Undo Send window passes without intervention, the email is delivered as normal.
This buffer is configurable, and understanding how to change this delay is essential to maximizing the effectiveness of the unsend feature.
Step-by-Step Instructions to Unsend an Email on an iPhone
Using iOS 16 or later, here’s how you can easily unsend an email:
1. Open the Mail App
Ensure your iPhone is running iOS 16 or newer. Open the default Mail application to begin.
2. Send an Email
Compose and send your email as you normally would. Once you hit “Send,” stay on the screen.
3. Look for the “Undo Send” Button
At the bottom of the screen, immediately after sending, you’ll notice a small “Undo Send” button.
4. Tap It Quickly
Tap “Undo Send” within the allowed time frame (10, 20, or 30 seconds depending on your settings). The email will reappear in draft form.
5. Edit or Delete
Now that the message is back in draft mode, you can either:
- Make corrections and send it again.
- Discard it if you’ve changed your mind.
How to Adjust the Delay Time:
To increase your undo window:
- Go to Settings > Mail > Undo Send Delay
- Choose your preferred delay: 10, 20, or 30 seconds
Increasing the time gives you more flexibility to spot mistakes and take action.
Step-by-Step Instructions to Unsend an Email on a Mac
On a Mac running macOS Ventura or later, the process is just as straightforward:
1. Open the Mail App
Ensure your device is updated to macOS Ventura or later. Launch the built-in Mail application.
2. Compose and Send Your Message
Write your email and click “Send” as usual.
3. Find the “Undo Send” Option
At the bottom-left corner of the Mail window, you’ll see “Undo Send” appear briefly.
4. Click Quickly
Click “Undo Send” within the delay window. Your email will reopen in draft form.
5. Make Necessary Changes
After retrieving the draft:
- Correct any mistakes.
- Add forgotten attachments.
- Modify recipients if needed.
- Then send it again or discard it.
Adjust Undo Send Delay on Mac:
- Open Mail > Settings (or Preferences)
- Click on the Composing tab.
- Look for the Undo Send Delay dropdown and select between 10, 20, or 30 seconds.
Why the Undo Send Feature is So Valuable
Mistakes in email communication happen more often than we’d like to admit. Here are common scenarios where the ability to unsend an email can save you:
- Wrong Recipient: Sending confidential information to the wrong person.
- Missing Attachments: You mention an attachment, but forget to include it.
- Typos and Grammar Errors: Professional communication demands correctness.
- Emotional Responses: Regretting a message written in frustration or haste.
- Incorrect Information: Sending outdated or incorrect data.
Apple’s Undo Send feature offers users a safety buffer that can prevent these types of communication errors from escalating.
Key Limitations of the Feature
As helpful as this function is, it’s important to be aware of its boundaries:
- Time-Sensitive: After the chosen delay period ends, the email is officially sent and cannot be undone.
- Only Available in Mail App: The feature is exclusive to Apple’s Mail app and won’t work in third-party apps like Gmail or Outlook.
- iOS/macOS Version Dependency: Requires iOS 16+ or macOS Ventura+.
- No Undo After Switching Apps: If you switch to another app too quickly, the Undo option may disappear before you get the chance to use it.
Best Practices for Using the Undo Send Feature
To get the most out of this feature, follow these best practices:
1. Stay on Screen After Sending
Avoid switching apps or closing Mail immediately after sending. Wait at least 10 seconds to see if you notice any mistake.
2. Maximize Delay Time
Always set your Undo Send delay to 30 seconds. It gives you the best chance to catch errors without feeling rushed.
3. Proofread Before and After
Even with Undo Send, it’s wise to double-check everything before hitting “Send.” After you send, do a quick scan to make sure nothing looks off.
4. Use Smart Subject Lines
A clear subject line can sometimes help you spot when a message went to the wrong person or is poorly phrased.
5. Regularly Update Your System
Ensure your iPhone and Mac are always updated to the latest versions to maintain feature access and reliability.
Real-World Scenarios: When Undo Send Saved the Day
Scenario 1: Business Proposal with an Error
A sales manager accidentally sent a proposal to the wrong client. Thanks to the Undo Send option, she was able to retract it in time, fix the name and figures, and resend it accurately.
Scenario 2: Job Application Mishap
A job seeker forgot to attach their resume. Catching the mistake seconds after sending, they tapped Undo Send, attached the file, and avoided appearing careless.
Scenario 3: Personal Email with Wrong Tone
Someone vented frustrations in an email and sent it impulsively. Undo Send allowed them to rethink and revise the message with a more professional tone.
Recommended to Read: How to Create New Folders in Mac Mail
Troubleshooting: If Undo Send Doesn’t Appear
If you’re not seeing the “Undo Send” option, here’s what you can do:
- Check iOS/macOS Version: Make sure your device is updated to iOS 16+ or macOS Ventura+.
- Use Apple Mail App: Confirm that you are using the native Mail app and not a third-party application.
- Check Delay Settings: Ensure that Undo Send Delay is turned on in settings.
- Don’t Leave the App: If you immediately switch to another app, the Undo option may disappear too soon.
Advanced Tips for Power Users
1. Use Scheduled Send in Tandem
Apple Mail also allows users to schedule email sending. If you often need extra time to review, use this feature along with Undo Send to avoid mistakes altogether.
2. Enable “Ask Before Sending”
Third-party email tools often offer “Are you sure?” prompts. Though not available natively in Apple Mail, these can be helpful when integrated through other apps or email services.
3. Combine with Focus Mode
Use iOS/macOS Focus Mode to minimize distractions while sending important emails. Reducing interruptions lowers the chance of making mistakes.
Conclusion
Being able to unsend an email on an iPhone or Mac is one of the most practical and stress-reducing features Apple has rolled out in recent updates. With a brief, customizable delay after you hit “Send,” Apple gives users a second chance to catch errors, update attachments, change recipients, or simply reconsider their message. From both professional and personal perspectives, this feature is a crucial part of effective and responsible email communication.
Visit Our website: Simplychiclife